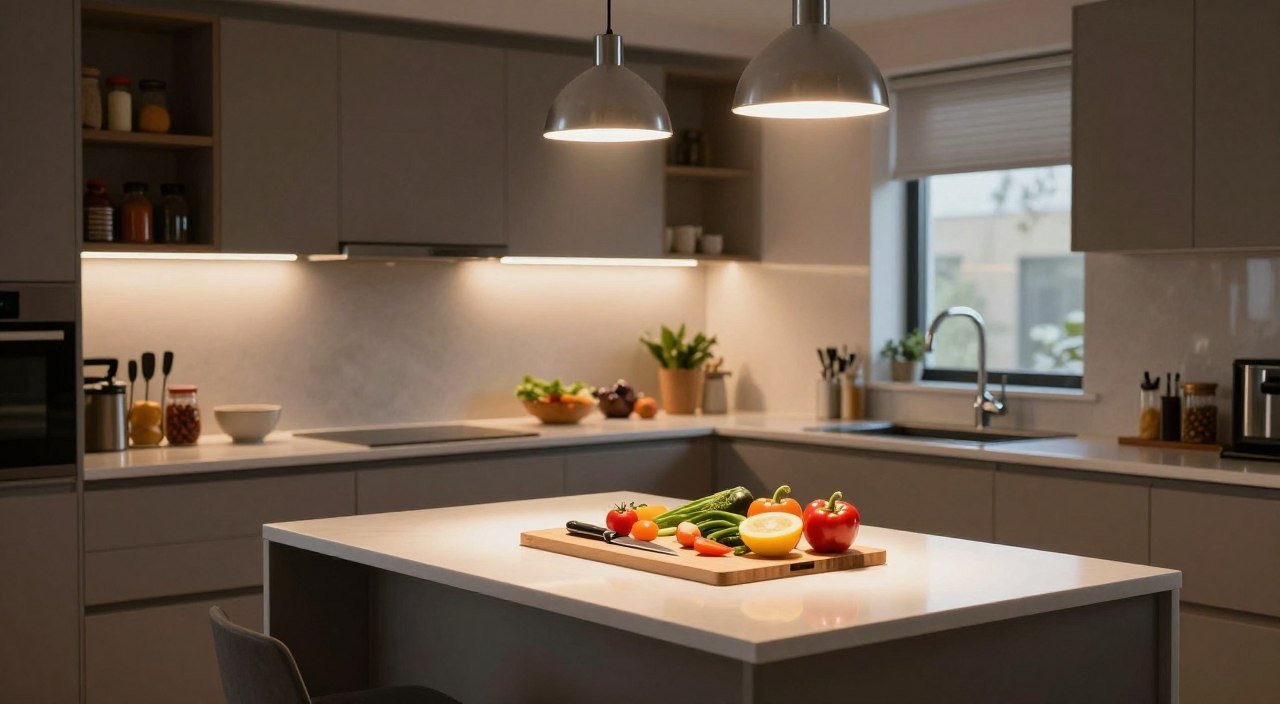
Cooking is fun when your space is bright. Shadows can make it hard to chop veggies or read recipes. The right task lighting placement for kitchen prep areas makes cooking safer and faster.
Good lighting does more than help you see. It turns your kitchen into a highly functional hub. By avoiding design mistakes, you make sure every part of your counter gets light. This stops eye strain and makes cooking quicker.
This guide offers expert tips for making smart choices. We’ll talk about picking the best lights and how to keep them working well. Follow these steps to make a beautiful and practical space for all your cooking needs.
Understanding the Importance of Proper Kitchen Lighting
Turning your kitchen into a pro workspace starts with good lighting. Many focus on looks, but function is key. Kitchen task lighting makes your space work better and look great.
Why Task Lighting Matters for Safety
Good light stops accidents with sharp knives or hot pans. Shadows can hide dangers. Effective lighting makes every move clear.
Smart task lighting ideas for kitchen areas lower slip and burn risks. Bright light keeps your workspace visible. This makes your kitchen safer for cooking.
The Impact of Lighting on Culinary Efficiency
Great lighting is more than safety; it boosts your work flow. Clear light means less squinting and more fun. This is great for long cooking or complex meals.
Right lighting changes your daily cooking. Chopping or measuring spices is quicker and more precise. Kitchen task lighting keeps you moving fast and happy.
| Lighting Feature | Safety Benefit | Efficiency Gain |
|---|---|---|
| Under-Cabinet Strips | Eliminates knife shadows | Faster prep time |
| Adjustable Pendants | Clear view of hot pans | Better ingredient visibility |
| Dimmable Controls | Prevents glare fatigue | Customized work environment |
Looking into task lighting ideas for kitchen is key to a better home. Right light and placement make your kitchen efficient. Investing in your lighting is truly an investment in your culinary success.
Assessing Your Kitchen Layout for Optimal Placement
Starting a lighting project means looking closely at your kitchen. Before buying any lights, check your floor plan. Find out where you cook most. This helps place your kitchen task lighting where it’s most needed.
Identifying Primary Prep Zones
Watch how you use your kitchen to find key spots. You probably chop veggies, knead dough, or plate food in certain areas. These primary prep zones are often between the sink and stove.
Focus on these busy spots for your task lighting ideas for kitchen. Make sure your countertops get bright, focused light. This helps avoid eye strain while cooking.
Mapping Out Shadow-Prone Areas
Shadows happen when overhead lights are blocked. Stand in your usual spot and see where shadows fall. If you find dark spots, you need more light.
Marking these areas helps you place lights right. Think about different kitchen zones and what they need for good light:
| Zone Type | Primary Activity | Lighting Priority |
|---|---|---|
| Main Countertop | Chopping and Prep | High intensity, shadow-free |
| Stovetop Area | Cooking and Sautéing | Heat-resistant, wide beam |
| Kitchen Sink | Cleaning and Rinsing | Water-resistant, focused |
| Island Surface | Serving and Socializing | Adjustable, ambient balance |
Mastering Task Lighting Placement for Kitchen Prep Areas
Good lighting makes a kitchen work well and safely. To get the right task lighting placement for kitchen prep areas, measure carefully. This makes sure light shines right on the counter.
When you set up your kitchen, think about how you move and the light. This stops light from getting in the way.
Positioning Lights to Eliminate Countertop Shadows
Shadows happen when overhead lights are behind you at the counter. To fix this, put task lighting fixtures for kitchen prep areas under your cabinets. This makes sure light is closer to your cutting board than you are.
Mount your lights near the front of the cabinet. This spreads the light across the counter. It keeps your view clear of ingredients and tools.
Calculating the Ideal Distance from Backsplashes
The space between your light and the backsplash is key. If it’s too close, light can be too strong and show flaws in the backsplash. Try to place lights 2 to 3 inches from the cabinet edge for even light.
This distance stops light from bouncing off the backsplash and causing glare. When picking task lighting fixtures for kitchen prep areas, think about the bulb’s beam angle. A wider angle spreads light better.
Avoiding Glare on Polished Surfaces
Polished countertops can reflect light too much if not lit right. Use diffused lighting instead of bright bulbs. You can also use covers or lenses to soften the light and cut down on reflections.
| Placement Strategy | Shadow Reduction | Glare Control | Best For |
|---|---|---|---|
| Front Cabinet Edge | Excellent | High | Deep Countertops |
| Center Cabinet | Moderate | Moderate | Standard Depth |
| Backsplash Mount | Low | Low | Decorative Focus |
By following these tips for task lighting placement for kitchen prep areas, you make your kitchen great. Good planning keeps your kitchen beautiful and useful for all meals.
Selecting the Right Fixtures for Your Workspace
Choosing the right hardware makes your kitchen look professional. It’s important to pick the right parts for a smooth look and even light. The best task lighting fixtures for kitchen prep areas keep your space bright and useful for a long time.

Benefits of LED Under Cabinet Lighting
Modern under cabinet lighting changes kitchen design. LED lights use less power than old bulbs. This means you save money on your bills.
These lights also last a long time and don’t get hot. This is great when you’re near food or ingredients. They stay bright for all your cooking needs.
Choosing Between Puck Lights and Linear Strips
Choosing between puck lights and linear strips depends on your kitchen. Puck lights are small and focus light well. They’re good for special areas or glass cabinets.
Linear strips give a smooth light over your counter. They’re best for long areas because they cover everything. They make your kitchen look modern and complete.
Your choice should match your kitchen’s layout and light needs. Whether you like pucks for variety or strips for a full look, good under cabinet lighting makes cooking better. Getting the right task lighting fixtures for kitchen prep areas now means a better kitchen later.
Step-by-Step Guide to Installing Under Cabinet Lighting
Putting in your own under cabinet lighting makes your kitchen better. It’s a fun project. You get to make sure your kitchen is well-lit for cooking.
Preparing Your Surface and Power Source
First, clean the bottom of your cabinets well. This gets rid of grease and dust. A clean surface helps the adhesive stick better.
Then, choose between a plug-in or hardwired system. Plug-in lights are easy to start with. Hardwired lights look better but need more skill. Make sure your power source can handle the lights’ total wattage.
Mounting Fixtures for Maximum Coverage
Place your lights at the front of the cabinet bottom. This stops shadows when you’re cooking. Use a tape measure to keep the lights even.
«Precision in fixture placement is the difference between a dimly lit corner and a professional-grade culinary station.»
— Kitchen Design Expert
For linear strips, put them in the middle for even light. Space puck lights the same way to avoid dark spots. This makes sure your under cabinet lighting works well.
Safety Precautions During Electrical Installation
Always be careful when working with electricity. Turn off the power at the main breaker first. Use a voltage tester to check if it’s off.
If you’re not sure about your wiring, get a pro. This keeps you safe and follows the rules.
| Feature | Plug-in System | Hardwired System |
|---|---|---|
| Installation Difficulty | Low (DIY Friendly) | Moderate (Requires Wiring) |
| Aesthetic Appeal | Visible Cords | Seamless/Hidden |
| Flexibility | High (Easy to Move) | Low (Permanent) |
By following these steps, you can light up your kitchen well. It makes cooking more fun and adds value to your home.
Integrating Overhead Lighting for Balanced Illumination
A professional kitchen needs more than just task lights. It needs overhead lighting for kitchen prep too. Localized lights cover the immediate area, but broad light is needed for a balanced glow. This makes your kitchen bright and welcoming for cooking and hanging out.

Using Recessed Lighting as Supplemental Task Light
Recessed lights are great for filling in dark spots. They work well in a grid or along work zones. This layered lighting effect gets rid of shadows. It makes sure you can see well, even when moving around.
Think about the tasks you do in each area when planning. You want enough light for detailed work without glare. Dimmers help adjust the light for different times or tasks.
Positioning Downlights Relative to Cabinetry
Where you put your downlights is very important. Avoid harsh shadows or uneven light. Don’t place lights too far back, or you’ll cast your shadow on the counter.
Place your overhead lighting for kitchen prep a bit in front of the cabinets. This ensures light hits your work area directly. Proper placement avoids the «tunnel effect» and keeps your kitchen looking good and working well.
| Lighting Type | Primary Function | Best Placement |
|---|---|---|
| Under-Cabinet | Direct Task Work | Beneath upper cabinets |
| Recessed Downlights | Ambient/Supplemental | Aligned with cabinet edges |
| Pendant Lights | Decorative/Task | Above islands or sinks |
Optimizing Lighting for Kitchen Islands and Peninsulas
Using your kitchen island for food prep changes everything. It’s where you chop, mix, and plate. So, your overhead lighting for kitchen prep needs to be good and in the right spot. Without it, your island can be dark and slow you down.
Selecting Pendant Heights for Prep Tasks
The height of your pendant lights is key. Hang them 30 to 36 inches above your counter. This keeps the light out of your way while you work.
If they’re too high, you get glare. Too low, and you can’t see well. The right height makes everything clearer and easier.
Ensuring Even Light Distribution Across Large Surfaces
Big islands and peninsulas need more than one light. This stops shadows. Use many small pendants instead of one big one.
Even overhead lighting for kitchen prep means no dark spots. It makes your kitchen look pro. Here’s a guide to help you set it up right:
| Island Length | Recommended Pendants | Spacing Between Lights |
|---|---|---|
| Under 5 feet | 2 Pendants | 24 inches |
| 5 to 8 feet | 3 Pendants | 28 inches |
| Over 8 feet | 4 Pendants | 30 inches |
Follow these spacing tips for a well-lit island. It makes cooking better and your home look great. Good lighting is worth the effort every time you cook.
Choosing the Right Color Temperature and Brightness
Finding the best lighting for kitchen work areas is key. It’s all about the right mix of color and light. The bulbs you pick affect how food looks and how comfy you feel cooking.

Why Warm White vs. Cool White Matters
Color temperature is in Kelvins (K). It sets the mood of your light. Warm white light, around 2700K to 3000K, feels cozy and inviting. It’s great for social areas but might be too yellow for detailed tasks.
Cool white light, from 3500K to 4500K, looks crisp and clean. It’s the best lighting for kitchen work areas because it’s easy on the eyes. It helps you see food colors clearly, making your kitchen feel professional.
Understanding Lumens and CRI for Food Preparation
Lumens measure light brightness, not watts. For food prep, you need enough light without glare. Brighter lights are needed for busy areas, while softer lights are better for overall ambiance.
The Color Rendering Index (CRI) shows how well a light shows true colors. For the best lighting for kitchen work areas, aim for a CRI of 90 or higher. This makes fresh food and meats look their best, helping you judge freshness and cooking.
| Lighting Metric | Recommended Range | Primary Benefit |
|---|---|---|
| Color Temperature | 3000K – 4000K | Visual clarity and comfort |
| Brightness (Lumens) | 500 – 800 per foot | Eliminates dark shadows |
| Color Rendering (CRI) | 90+ | Accurate food color |
Advanced Lighting Control Options
Getting the best lighting for kitchen work areas is about controlling your lights well. Modern kitchens are for cooking, eating, and hanging out. They need flexible lighting that changes with your day.
Implementing Dimmers for Versatile Kitchen Use
Dimmer switches are great for managing your kitchen. They let you switch from bright, focused task lighting to a cozy glow for parties.
Dimming your lights makes your eyes happy. It also makes your kitchen feel warm. Plus, dimmers make bulbs last longer and save energy.
Smart Lighting Solutions for Modern Kitchens
Smart lights take kitchen lighting to a new level. They can be controlled by your phone or voice. This means your lights can change on their own or with your voice.
These smart systems give you the best lighting for kitchen work areas. You can set lights for baking or turn them off when you leave. It’s all about ultimate convenience and efficiency for your home.
Common Mistakes to Avoid in Kitchen Lighting Design
Even the most expensive kitchen fixtures can fail if your lighting plan lacks foresight. High-quality hardware cannot compensate for poor kitchen lighting design. This often leads to a space that feels cluttered or uncomfortable. By identifying these frequent errors early, you can create a balanced and inviting environment.

Preventing Over-Lighting and Harsh Contrast
A common mistake is installing too many high-intensity lights. This can turn your kitchen into an unwelcoming operating room. Excessive brightness often creates harsh shadows that make food preparation difficult and visually jarring.
You should aim for a layered approach rather than flooding the entire ceiling with uniform, blinding light.
Harsh contrast occurs when you have bright spots directly next to dark, unlit corners. This imbalance forces your eyes to constantly adjust, leading to unnecessary strain during long cooking sessions. Instead, focus on diffusing light across your surfaces to maintain a soft, consistent glow throughout the room.
Addressing Inconsistent Light Levels
Inconsistent light levels often make a kitchen feel disjointed and poorly planned. When one area is significantly brighter than another, the transition between zones becomes awkward and disrupts your workflow. You want your kitchen lighting design to feel cohesive, ensuring that every corner receives adequate illumination for its specific task.
To fix this, evaluate the brightness of your fixtures in every zone, from the stove to the pantry. If you notice dark patches, consider adding supplemental lighting to bridge the gap between your primary sources. Achieving a harmonious balance is essential for both the aesthetic appeal and the daily functionality of your home.
Maintenance Tips for Long-Lasting Kitchen Lighting
Keeping your kitchen lights working well starts with cleaning and checking them often. Regular care helps your lights last longer. A little time each week keeps your kitchen safe and bright for cooking.
Cleaning Fixtures to Maintain Brightness
Dust and grease can make your lights less bright. Use a soft, dry microfiber cloth to wipe them every few months. Avoid harsh chemical cleaners to protect your lights.
For tough stains, use a damp cloth with mild soap. Make sure the power is off before cleaning. Regular cleaning keeps your kitchen looking great.
Troubleshooting Flickering or Dimming Issues
Even with good installation, lights might sometimes flicker or dim. Flickering can mean a loose wire or a dying bulb. Check all wires and bulbs are tight.
Dimming might mean your dimmer switch doesn’t match your lights. Make sure your switch works with your kitchen lighting design. If it still doesn’t work, get a pro to check the wiring.
By following these tips, you can avoid costly repairs. Keeping your kitchen lights in good shape is key to a great cooking space.
Conclusion
A good lighting plan is a big upgrade for your home. It makes your space safe and efficient. This is done by placing lights right and choosing the best fixtures.
Your kitchen should support all your cooking dreams. Keeping it clean and bright makes it work well for years. Now, you know how to make your kitchen better and cooking easier.
Good lighting is a smart choice for your home’s future. It lets you control your space and feel like you’re in a pro kitchen. Start your lighting project today to see how it changes your kitchen.
Share your favorite lighting setup or ask about specific lights. Your ideas help others make better kitchens. We can’t wait to hear about the bright changes you make at home.
FAQ
What is the most effective task lighting placement for kitchen prep areas to avoid shadows?
Mount your kitchen task lighting toward the front of the upper cabinet. This stops shadows on your countertop. Fixtures from Kichler work well here, giving you a clear view of your ingredients.
How do I choose between different task lighting fixtures for kitchen prep areas?
Choose based on your cabinetry layout and style. Linear strips give a smooth glow for long counters. Puck lights focus light well for specific spots. Designers often pick linear LED strips for a professional look.
Why is a high Color Rendering Index (CRI) important for the best lighting for kitchen work areas?
A high CRI makes colors look natural under light. Look for a CRI of 90 or higher. This makes food look fresh and natural, important for cooking.
What are some creative task lighting ideas for kitchen islands?
Kitchen islands need a mix of lighting. Use high-output downlights or pendants from Halo. Make sure overhead lights are high enough for tasks like dough rolling.
Can I integrate smart technology when I learn how to install task lighting in kitchen spaces?
Yes, you can. Add smart dimmers from Lutron or color-changing bulbs like Philips Hue. This lets you change light colors and brightness for different times.
How do I prevent glare on polished countertops when using under cabinet lighting?
Glare on shiny surfaces is a problem. Use under cabinet lights with frosted lenses or diffusers. Also, angle your lights slightly to avoid glare.
Is overhead lighting for kitchen prep enough on its own?
Overhead lighting is good for general light but not for detailed tasks. Add task lighting above your work zones for clear visibility.