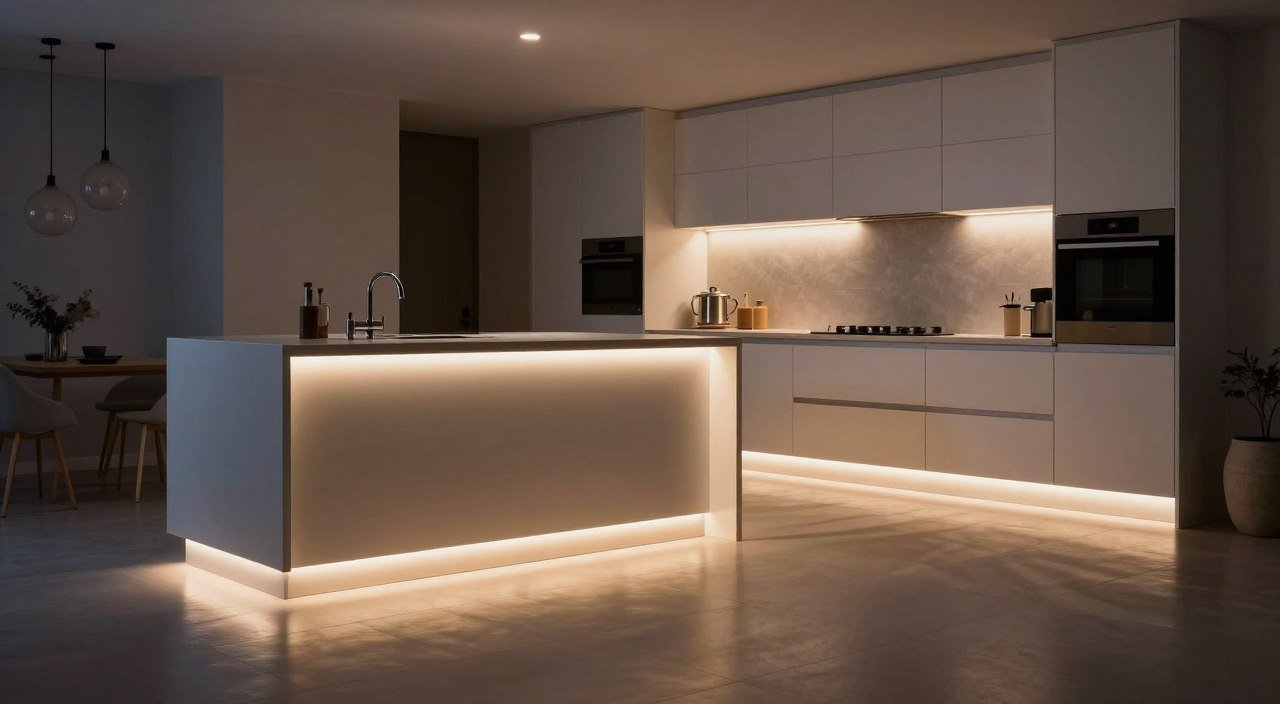
Changing your home starts with small details. Adding lights under your cabinets is a great way to modernize your space. These creative toe kick night lighting ideas for kitchens give a soft light. It makes your kitchen safer and more stylish.
These small changes can change your room a lot. They help you see better at night. Many people add this to make their home feel more special.
Looking for unique kitchen lighting ideas lets you make your kitchen your own. This guide will help you plan, install, and keep your lights working well. Get ready to elevate your interior design with our expert advice.
Planning your kitchen lighting design
Lighting up your kitchen floor needs a good plan. A smart plan makes your kitchen toe kick lighting fit right in with your decor. This creates a look that makes your kitchen better.
Assessing your kitchen layout for optimal light distribution
First, check out your kitchen’s layout. Find where shadows fall. Toe kick lights can light up dark spots under cabinets.
Think about these things when planning:
- The length of your cabinet runs and island perimeters.
- The proximity of power outlets to your baseboards.
- Potential obstructions like dishwasher doors or floor vents.
Choosing between warm white and cool white color temperatures
Picking the right color temperature is key for your kitchen lighting design ideas. The Kelvin scale affects the mood of your kitchen. The wrong color can clash with your other lights.
«Lighting is the most important element in interior design; it sets the mood and defines the functionality of the space.»
For a cozy, traditional feel, choose warm white (2700K–3000K). For a modern look, go with cool white (4000K–5000K).
Determining the necessary brightness levels for nighttime navigation
Your goal for kitchen toe kick lighting is safety and gentle light. You want enough light to move around at night without glare.
Use a dimmer switch to adjust the light. This way, you get a soft glow for night. It’s good for late-night snacks and keeps your kitchen lighting design ideas comfy.
Selecting the right LED components for toe kicks
Your choice of components is key to how long your led toe kick lighting lasts. These lights face challenges like spills and heavy foot traffic. High-quality materials keep your system bright for years.

Evaluating waterproof ratings for kitchen floor environments
When looking for kitchen toe kick lighting, check the Ingress Protection (IP) rating. This rating shows how well the electronics are protected from moisture and dust. For floor-level installations, an IP65 or higher rating is best to avoid short circuits from mopping or spills.
An IP65 rating means the strip can handle water jets, which is good for most kitchens. If you clean often, consider an IP67 rating for full submersion protection. Always check the rating on the packaging before buying.
Comparing flexible LED strips versus rigid aluminum channels
Flexible LED strips are great for curved cabinets or tight corners. But, they might not handle heat well for long-term use. Rigid aluminum channels help with heat dissipation, making your lights last longer.
These channels also give a professional look by hiding individual light dots. They make the light glow smoothly, not in harsh spots. Here’s a table showing the main differences between these two options.
| Feature | Flexible LED Strips | Rigid Aluminum Channels |
|---|---|---|
| Installation Ease | High | Moderate |
| Heat Dissipation | Low | Excellent |
| Light Diffusion | Poor | Superior |
| Durability | Moderate | High |
Understanding voltage requirements for long cabinet runs
Voltage drop is a problem with kitchen toe kick lighting on long cabinet runs. Electricity’s voltage drops as it travels, making lights at the end dimmer. Use a 24V system for longer runs instead of 12V.
If you have a very long run, power both ends of the strip. This keeps the lights bright all the way. Planning ahead avoids the need for rewiring later.
Creative toe kick night lighting ideas for kitchens
Make your home look better than just the usual lights. Creative toe kick night lighting ideas for kitchens can make your kitchen look fancy. These lights are safe for late-night snacks and make your kitchen look high-end.

Implementing color-changing RGB lighting for mood ambiance
Want to change your home’s mood fast? Try RGB LED strips. You can change the color to fit any mood. This makes your kitchen’s floor lights a fun design feature.
Using recessed aluminum profiles for a seamless, diffused glow
For a clean look, hide the LED tape. Use recessed aluminum profiles to soften the light. This makes the light look like it’s everywhere, but you can’t see it.
Creating a floating cabinet effect with high-density LED strips
Make your cabinets look like they’re floating. Use high-density strips at the base. This makes the cabinets look like they’re floating, which is very modern.
Highlighting kitchen islands with perimeter toe kick illumination
The kitchen island is the room’s center. Wrap LED strips around the island’s base. This makes the island a beautiful centerpiece that draws people in.
| Lighting Style | Primary Benefit | Best Use Case |
|---|---|---|
| RGB Color-Changing | Mood Versatility | Social Gatherings |
| Recessed Profiles | Professional Finish | Minimalist Kitchens |
| High-Density Strips | Floating Effect | Modern Cabinetry |
| Perimeter Lighting | Visual Anchoring | Kitchen Islands |
Preparing your cabinet base for installation
A solid foundation is key for under cabinet lighting for kitchens to last. Before you start, make sure the cabinet base is ready. This ensures a strong bond for your LED strips.

Cleaning surfaces for optimal adhesive bonding
Kitchens get dirty fast, with grease and dust on baseboards. Dirty surfaces can make adhesive strips fall off quickly.
To avoid this, clean the area well:
- Use a degreasing cleaner or isopropyl alcohol to wipe it down.
- Let it dry completely before touching it.
- Look for loose wood splinters or debris that might block the adhesive.
Identifying the best path for low-voltage wiring
Plan your wiring route carefully for a neat look. You want cables hidden but safe from damage.
Run wires along the cabinet base’s inner corners. This keeps them hidden. Use cable clips to keep them tight.
Ensuring proper clearance for mounting hardware
Check space before drilling or screwing into your cabinets. This is crucial for the cabinets’ safety.
Make sure mounting clips or channels don’t block doors or drawers. This keeps your under cabinet lighting for kitchens looking good for years.
Measuring and cutting LED strips to size
Getting the right fit for your baseboard lighting is easy. Just make a few precise cuts. When working with kitchen led strip lights, being accurate is key. This makes your installation look great and seamless.
Locating the correct cut points on your LED strips
Look at your strips carefully before cutting. Most have copper pads marked with a scissor icon. These show where it’s safe to cut the circuit.
Don’t cut anywhere else, or you’ll mess up the circuit. Use sharp scissors or a utility knife for clean cuts at the copper points.

Using solderless connectors for corner turns and gaps
Don’t worry about corners or gaps in your kitchen. Solderless connectors make it easy. They let you connect strips without a soldering iron.
Just slide the strip into the connector and lock it. This method gives a strong, reliable connection. It keeps your led toe kick lighting working well along your kitchen baseboards.
Testing the circuit before final application
Check each segment before sticking it down. Connect your strips to power and turn them on. Make sure there are no flickers or dark spots.
Testing now saves you from the hassle of removing and reapplying later. If everything looks good, you can install your kitchen led strip lights for real.
Wiring and connecting your lighting system
Getting toe kick lights for kitchen cabinets right means good wiring. It keeps your system working well and safe for a long time. Organizing cables now saves you trouble later.
Hiding the power supply inside adjacent cabinets
Don’t leave the power supply unit out in the open. Find a spot inside a nearby cabinet or pantry for it. This keeps it hidden and safe from kicks or spills.
If you put the power supply in a cabinet, make sure it has air to cool down. Drill a small hole in the side panel for the wires. This makes your toe kick lights for kitchen cabinets look like they were built in.
Managing cable runs to prevent tripping hazards
Loose wires are not just ugly, they’re also a safety risk. You need to keep cables tight against the cabinet or floor. Here are some tips for a neat setup:
- Use adhesive cable clips to keep wires along the back of the kick plate.
- Put cables in plastic conduits if they need to cross the floor.
- Coil and zip-tie extra wire inside the cabinet to avoid tangles.
Securing connections to avoid loose contact points
Loose connections can make lights flicker or go out. Walking or cleaning can loosen them. Always check that all connections are tight before closing your kick plates.
For a better fix, solder your connections or use strong snap-connectors. These hold better than clips, keeping your toe kick lights for kitchen cabinets bright. A solid connection means your kitchen stays well-lit.
Integrating smart controls and motion sensors
Imagine walking into your kitchen at night and lights turn on by themselves. This is what smart technology can do for your kitchen lighting design ideas. It makes your home safer and looks modern.
Positioning motion sensors for effective nighttime activation
Put sensors where you usually enter. They should be high enough to catch people but not pets. Strategic placement helps your ambient kitchen lighting work well.
Connecting your lights to smart home hubs for voice control
Link your LED lights to a smart hub. Then, you can change brightness with your voice. This makes controlling your kitchen lighting design ideas easy, even when you’re cooking.
Setting automated schedules for evening illumination
Set your lights to turn on and off automatically. This keeps your kitchen bright and welcoming at night. It also saves energy.
| Control Method | Primary Benefit | Ease of Use |
|---|---|---|
| Motion Sensors | Hands-free activation | High |
| Voice Commands | Remote adjustment | Medium |
| Automated Timers | Energy efficiency | High |
Troubleshooting common installation issues
Even the best plans can have problems. Keeping your modern kitchen lighting working right is important. Sometimes, you need a quick fix to keep things bright and working well.
Fixing flickering lights caused by voltage drop
Dimming or flickering lights might mean a voltage drop. This is when power can’t reach the end of the strip.
Try adding power at both ends of the strip. Using thicker wire for connections can also help keep lights bright.
Resolving adhesive failure on wood or laminate surfaces
The adhesive on LED strips might not stick well to wood or laminate. If your lights start to come off, don’t just use the original adhesive.
Use clear silicone adhesive or mounting clips to keep the strips in place. Clean the surface with isopropyl alcohol before applying to get a strong bond.
Addressing connectivity gaps in long LED runs
Loose or misaligned connectors can cause dark spots in your lights. Check the contact points for oxidation or misalignment if a section goes dark.
Re-seating the connector or adding a bit of solder can fix these gaps. Make sure your modern kitchen lighting has good contact points. This will avoid future problems and keep your kitchen looking great.
Maintaining your kitchen LED strip lights
Keeping your kitchen led strip lights in good shape is easy. Just spend a little time on them each day. This keeps your lights safe and looking great. It also helps your kitchen stay nice for longer.
Cleaning dust and debris from under-cabinet areas
The area under your cabinets gets dusty and dirty. This dust can make your lights overheat and not shine as bright. Clean this area every few months to keep your lights working well.
Make sure the lights are off before you clean. Use a soft cloth or a vacuum to get rid of dust. This keeps your lights and their mounts working right.
Checking for moisture buildup near floor-level electronics
Since your lights are near the floor, they can get wet. Water can damage your kitchen led strip lights. Check your wiring and lights often for water damage.
If you see water or condensation, dry it right away. Check your seals to make sure they’re working. This helps keep your lights safe from water damage.
Replacing individual segments without rewiring the entire system
Today’s lights are easy to fix because they’re made in parts. If a part of your kitchen led strip lights breaks, you don’t have to replace everything. Just find the broken part and replace it with a new one.
Always have some extra parts ready for quick fixes. This saves you time and money. It also keeps your kitchen bright without needing to rewire everything.
| Maintenance Task | Frequency | Goal |
|---|---|---|
| Dust Removal | Quarterly | Prevent Overheating |
| Moisture Inspection | Monthly | Avoid Short Circuits |
| Connection Check | Bi-Annually | Ensure Stability |
| Segment Testing | As Needed | Maintain Uniformity |
Conclusion
Installing toe kick lighting makes any room look fancy. It makes your home safer for late-night snacks. Plus, it adds a cool modern vibe.
These lighting ideas give your kitchen a fancy look without big changes. Pick quality LED lights from Philips Hue or Armacost Lighting for the best results.
Planning well keeps your lighting system working great for a long time. This protects your investment and keeps your kitchen looking great.
Try out different colors or smart controls to change your home’s mood. Now you know how to do it easily and well.
Show off your work to friends and family. Enjoy the cozy light and the better use of your kitchen.
FAQ
Why should I consider creative toe kick night lighting ideas for kitchens?
Kitchen toe kick lighting is good for both looks and function. It lights up the floor at night safely. It also makes your kitchen look fancy.
How do I choose the right color temperature for my kitchen lighting design ideas?
The right color depends on what mood you want. Warm white is cozy for wood finishes. Cool white is sharp for modern looks. Philips Hue lets you change these colors with an app.
Do led toe kick lighting strips need to be waterproof?
Yes, they should be IP65 or higher rated. They’re near the floor and can get wet. Kitchen led strip lights with silicone coating last longer.
Can I use the same products for both toe kicks and under cabinet lighting for kitchens?
Yes, you can. Brands like Kichler and Sylvania work for both. This keeps your lighting consistent.
What is the best way to secure toe kick lights for kitchen cabinets?
Clean the area with isopropyl alcohol first. Use adhesive or 3M VHB tape for extra hold. For a pro look, put lights in an aluminum channel.
How can I achieve a «floating» cabinet effect with unique kitchen lighting ideas?
Put kitchen led strip lights at the top of the toe kick. This makes the cabinets look like they’re floating. It’s a cool, modern look.
How do I manage the power supply and wiring for my ambient kitchen lighting?
Put the transformer in a nearby cabinet. Use low-voltage wiring to connect it. Use WAGO connectors to avoid loose wires.
Can I connect my kitchen toe kick lighting to a smart home system?
Yes, most systems can connect to smart hubs. Use Samsung SmartThings or Amazon Alexa for control. You can set schedules or use voice commands.
What should I do if my kitchen led strip lights are flickering?
Flickering means you might need more power. Make sure your transformer can handle the lights. Switching to 24V can help too.
How do I maintain my under cabinet lighting for kitchens and toe kick areas?
Wipe the lights with a microfiber cloth to clean them. Check the connections for moisture or rust, near sinks or dishwashers.